
Hey there, ready to learn how to carve a turkey like a pro? Trust me, it's not as daunting as it may seem. I know because I've been carving turkeys for years and I'm excited to share my tips with you. With my step-by-step guidance, you will be able to create a Thanksgiving platter that will make all your friends and family drool.
Once you have roasted the most tender, juicy, and perfectly golden turkey, it's time to take it to the next level by presenting it beautifully. By carving the turkey the right way, not only will it look like a masterpiece on the table, but it will also ensure that everyone gets a good balance of meat and skin in every bite. Trust me, that's a game-changer!
So, let's not waste any more time, grab a sharp knife, and get ready to impress your guests with your new carving skills. I will be with you every step of the way!
First Things First, Let The Turkey Rest
Don't rush into cutting into the turkey immediately quickly after you remove it from the oven. Give the turkey at least 30 minutes to rest. As a result, there will be more fluid in your turkey than on your cutting board since the juices may then be redistributed throughout the flesh.

Carving a Turkey: Step-By-Step
When it comes to carving a turkey, it may seem like a daunting task, but with a little guidance, anyone can do it. Today, I will be walking you through the process step by step, so you can impress your guests with a beautiful, perfectly sliced Thanksgiving turkey.
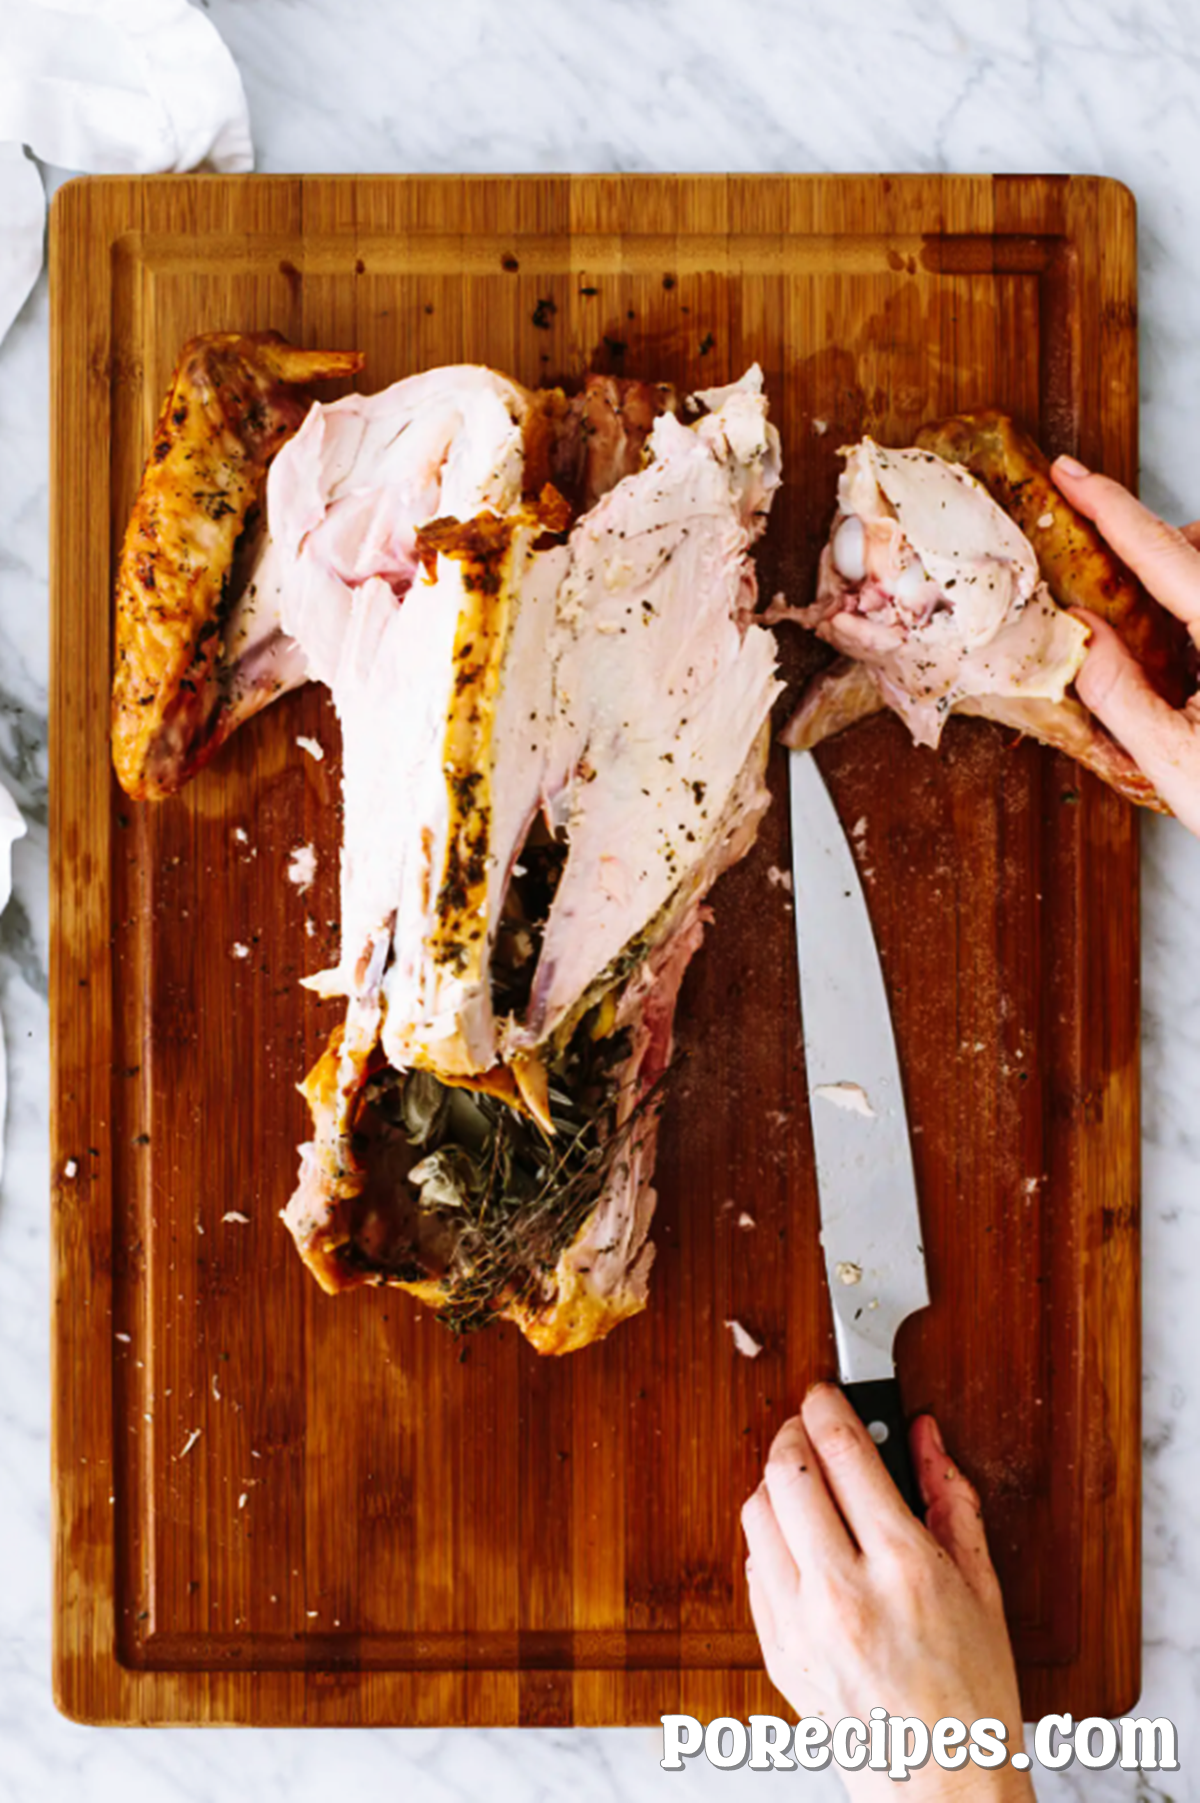
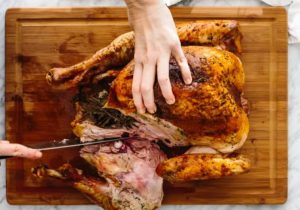
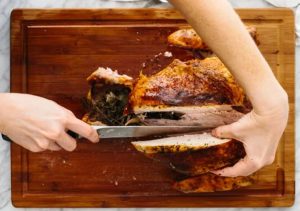
First, I start by slicing off the legs and thighs. To do this, I cut through the skin between the leg and the breast, then gently pull the leg back, exposing the joint.

I use my knife to cut around the joint and remove the leg and thigh completely. Then, I repeat this process on the other side and set these pieces aside.
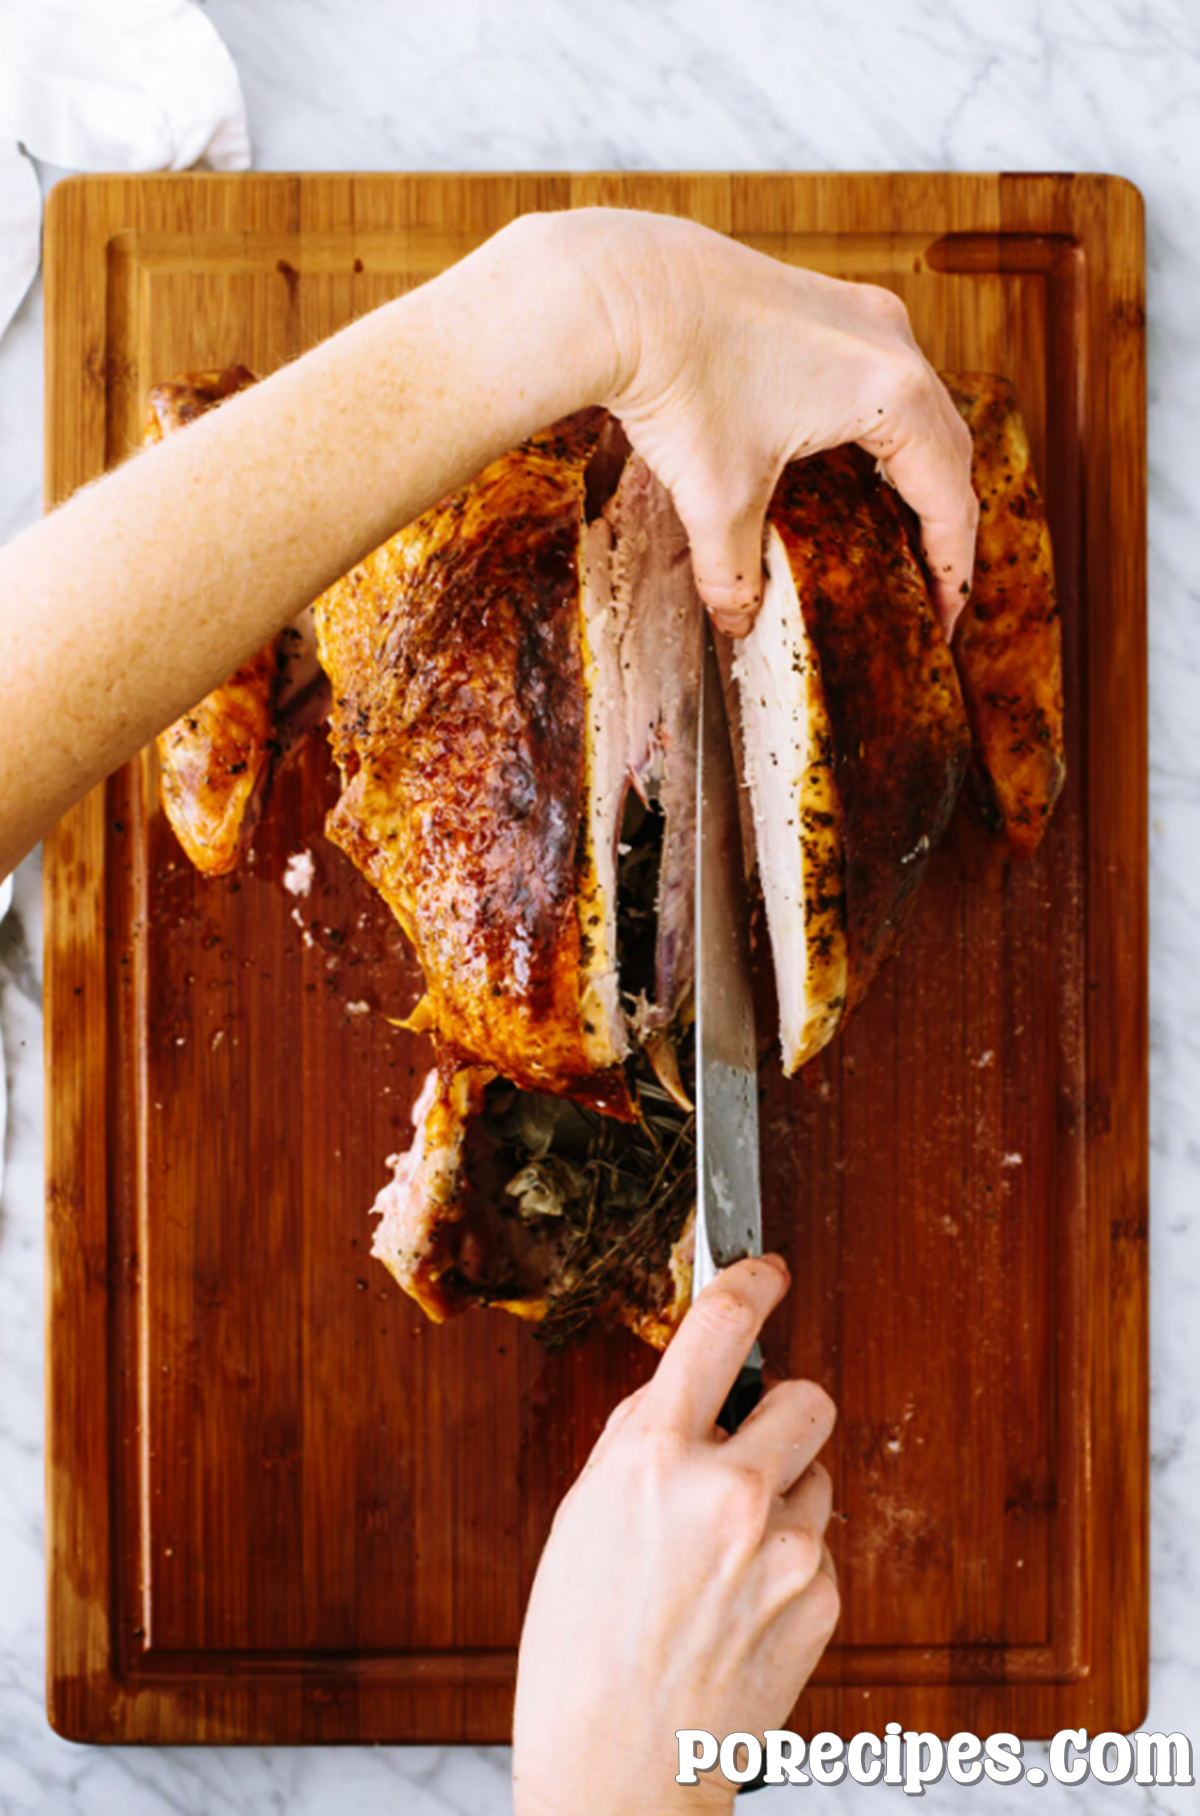
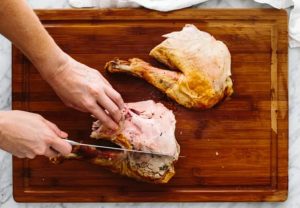
Next up are the breasts. I slice down on either side of the breastbone, using long, even strokes. As I hit the bottom, I gently pull the breasts outward with my thumb, continuing to slice down and out until the breast meat is removed.
If necessary, I will slice horizontally at the bottom of the breast from the outside to help remove it.
Once I’ve done this on both sides, I set the breasts aside with the legs and thighs. Now it’s time to separate the drumstick from the thigh.
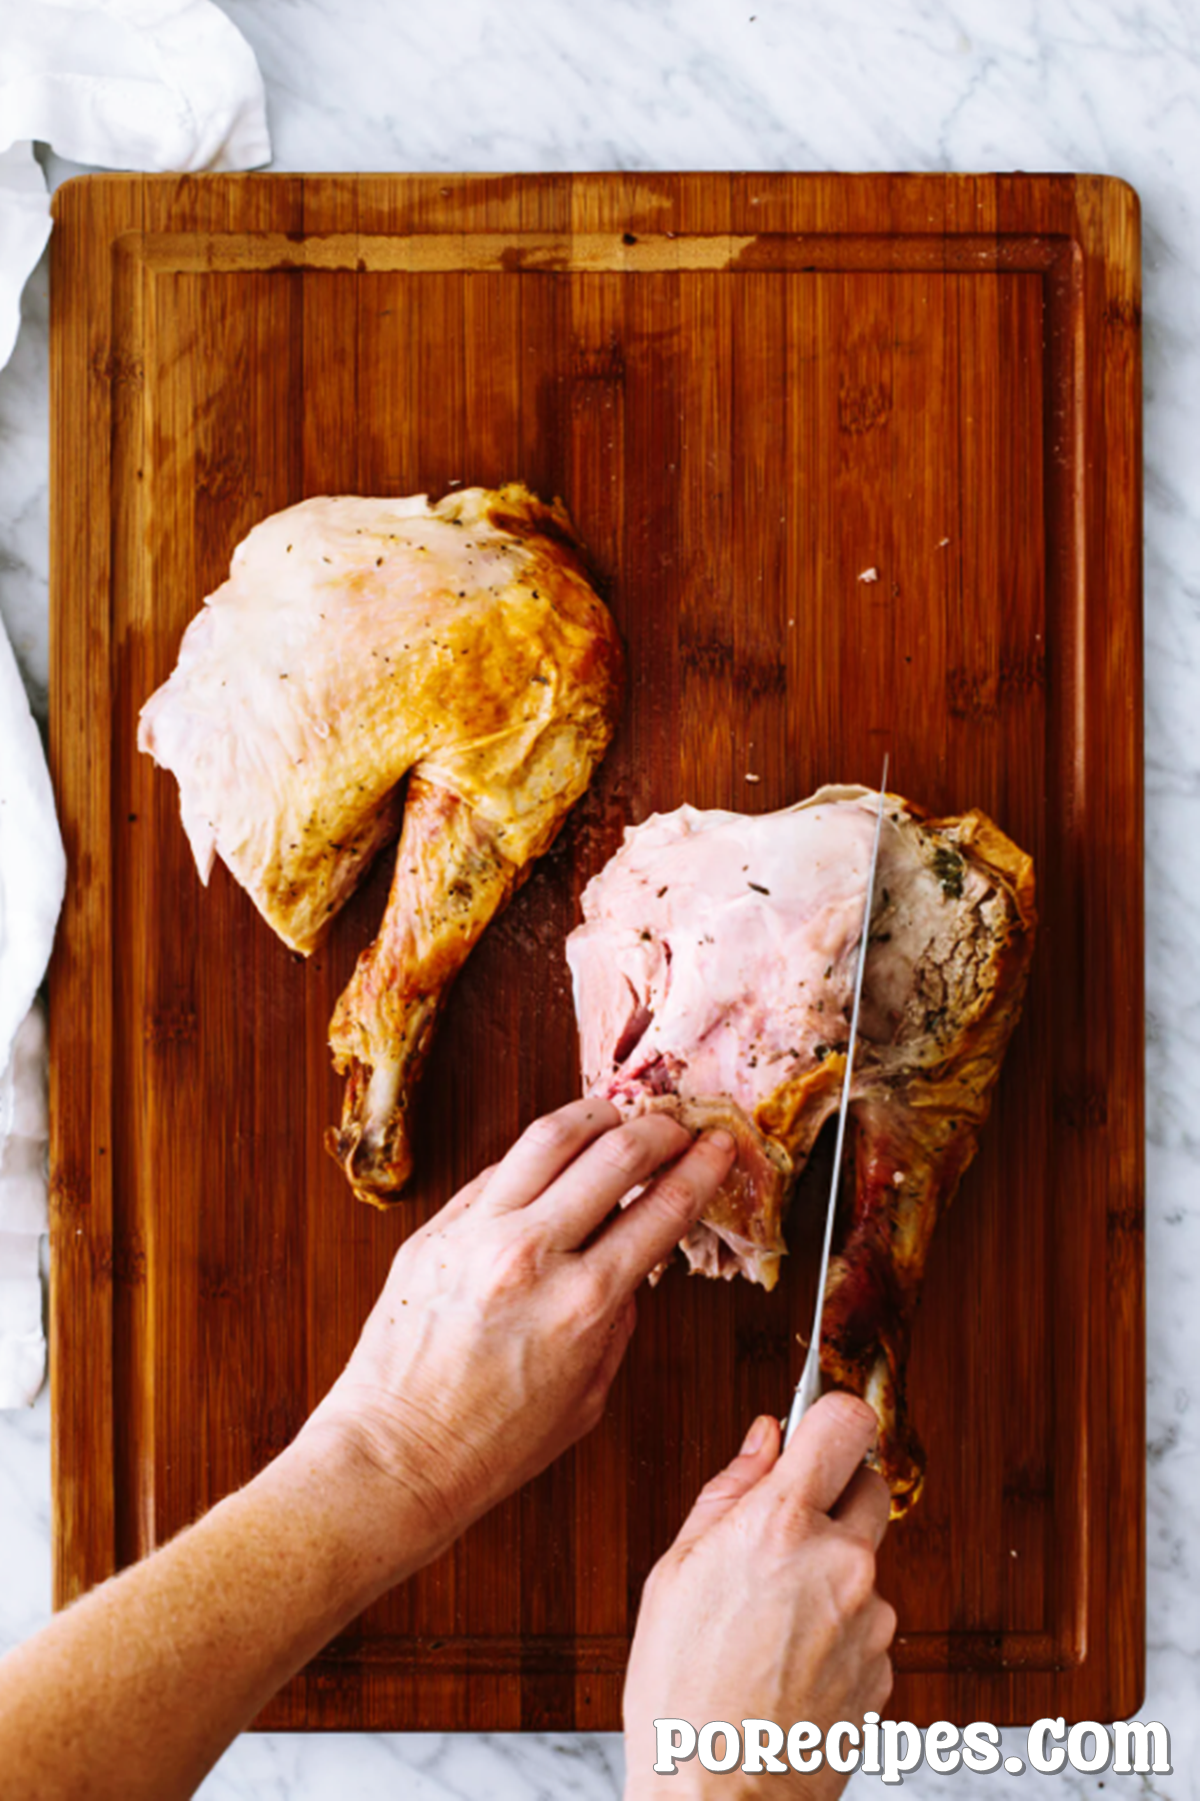
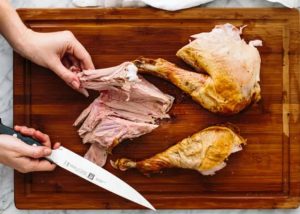
I flip the turkey piece over, so it’s skin side down, and identify the natural separation between the drumstick and the thigh.
Then, I slice through the meat and gently pull back on the drumstick to expose the joint, before slicing through it. This results in two pieces – the drumstick and the thigh.
To remove the bone from the thigh, I use my knife to slice around the bone, preserving as much meat as possible.
Once the bone is removed, I am left with a boneless thigh.
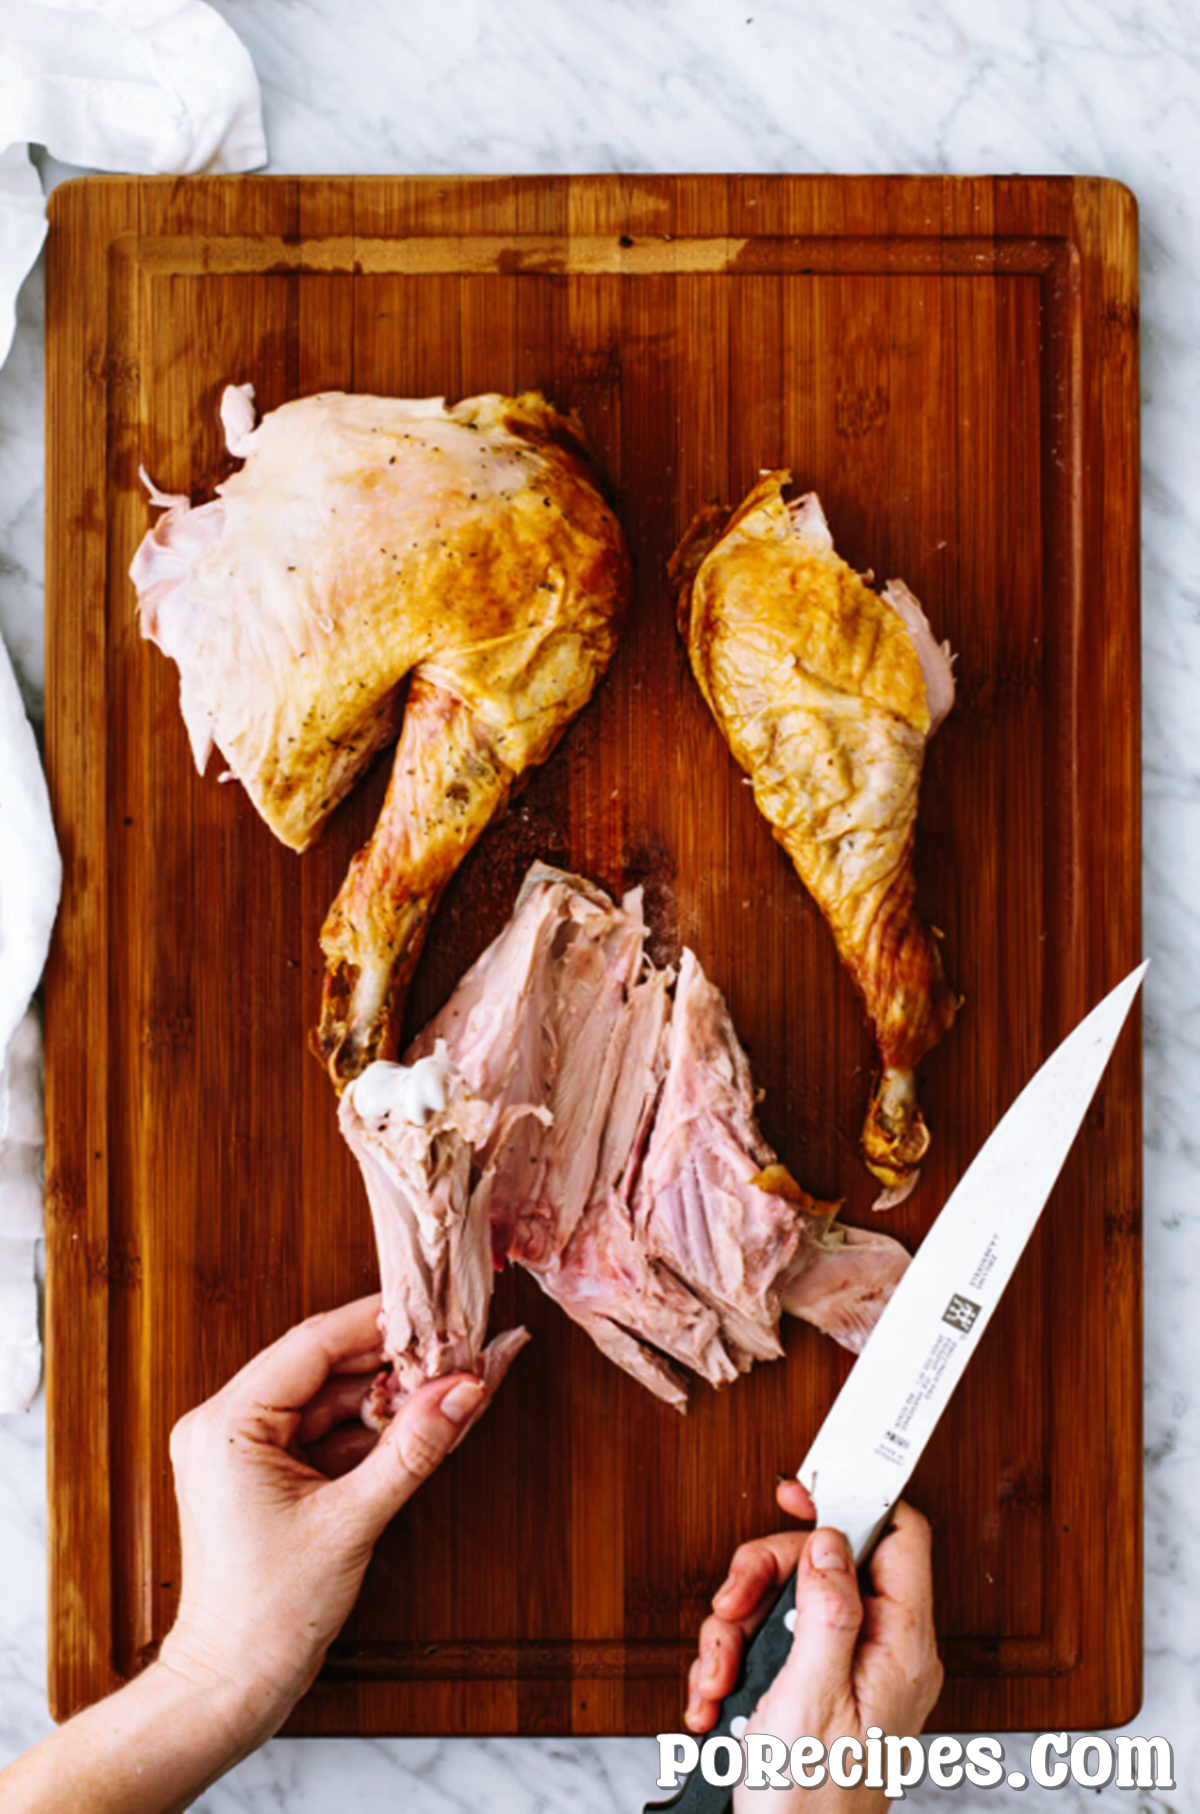
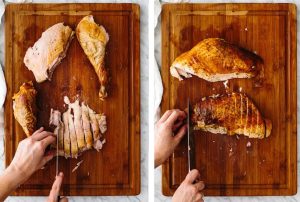
Finally, it’s time to slice up the meat. Remember two important things – slice against the grain for tender pieces of meat and use a very sharp knife to keep the skin attached to each piece.
And with that, your beautifully carved turkey is ready to be served and enjoyed!

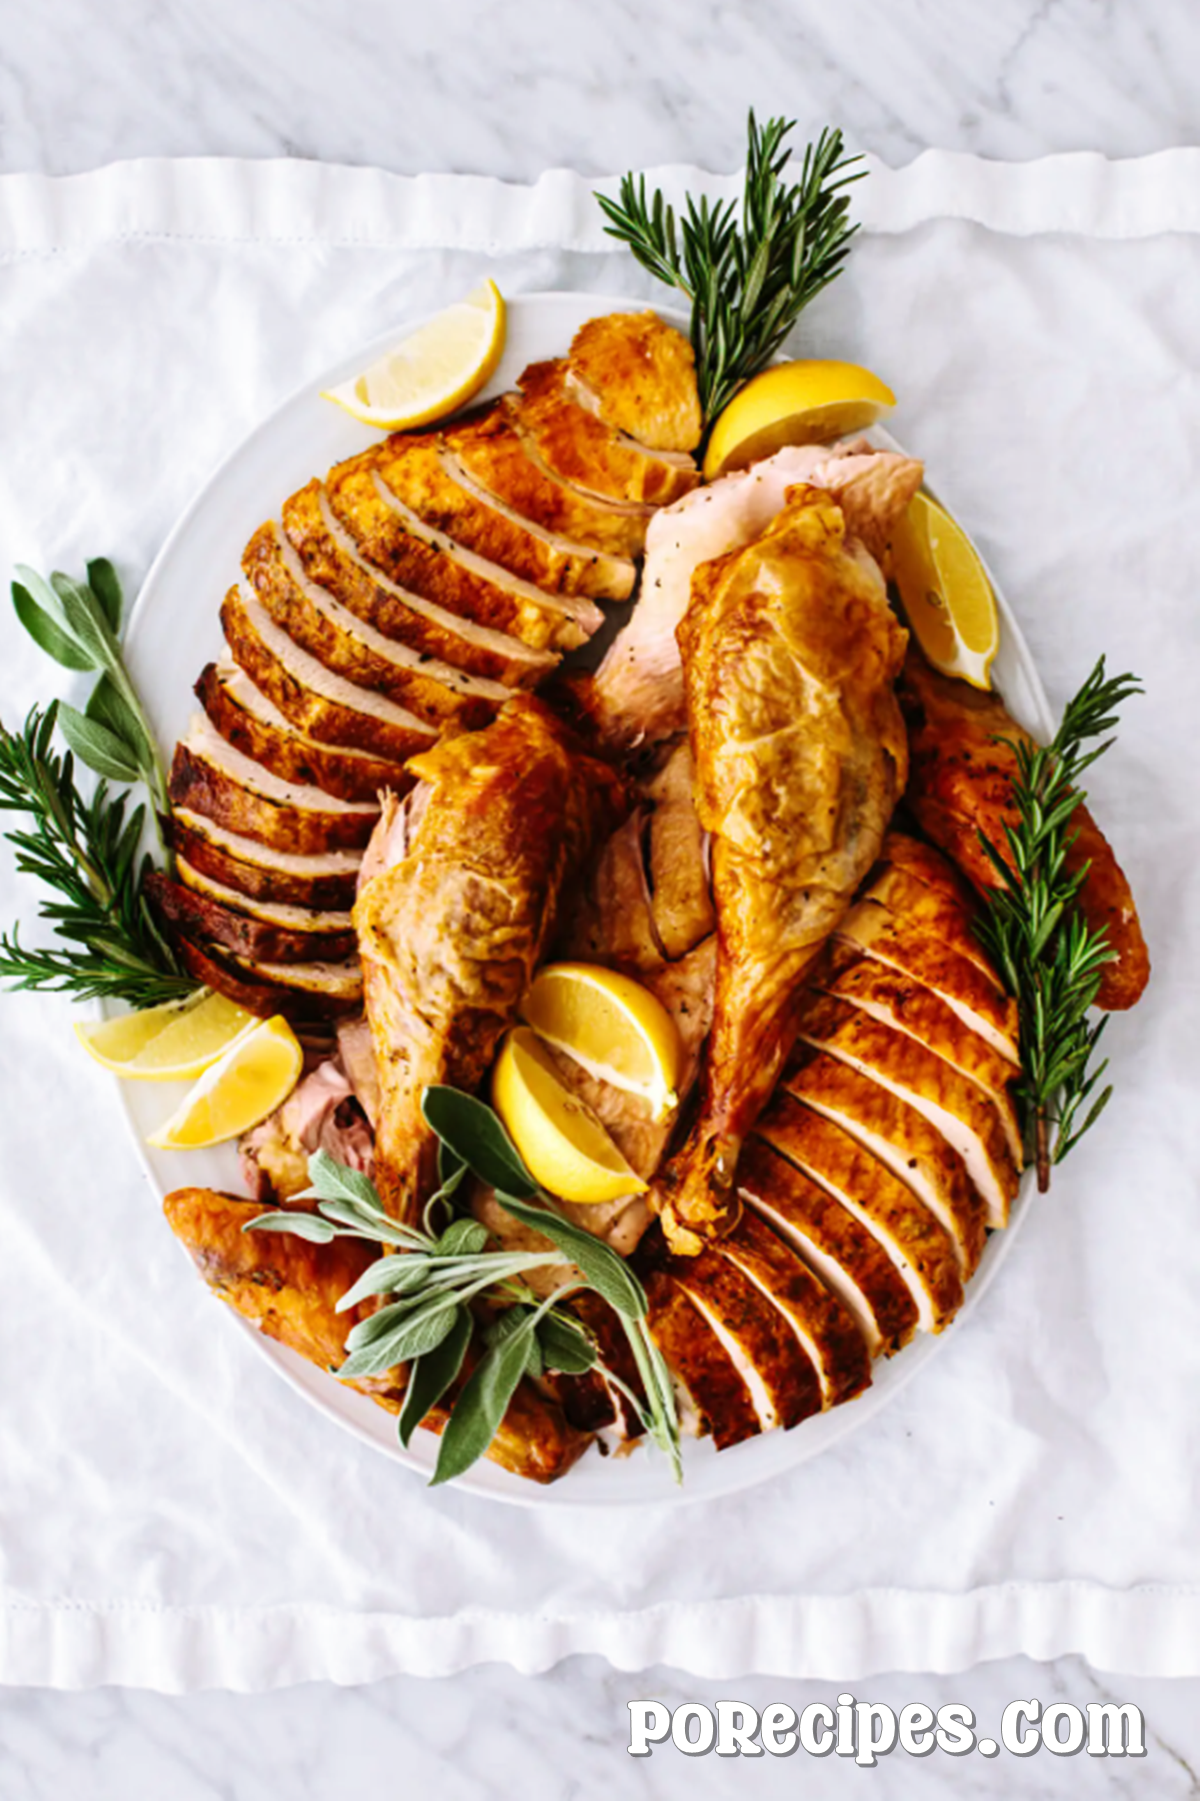
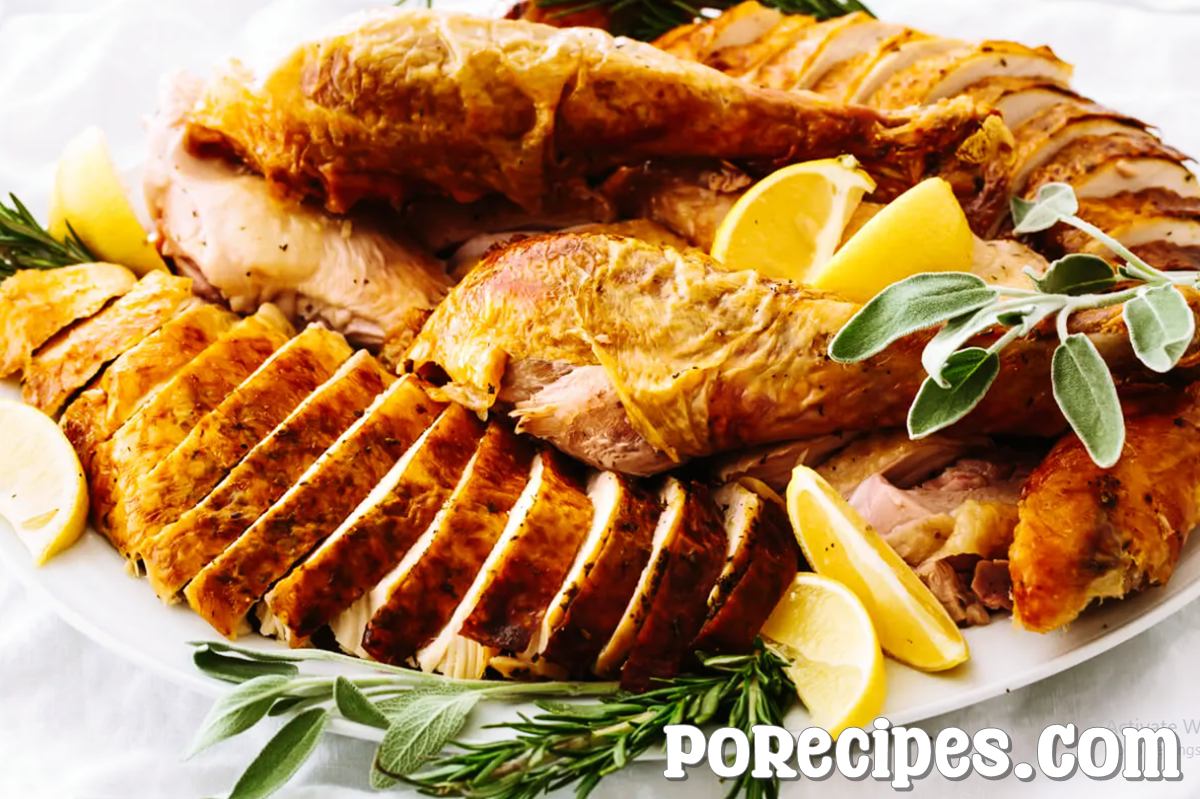
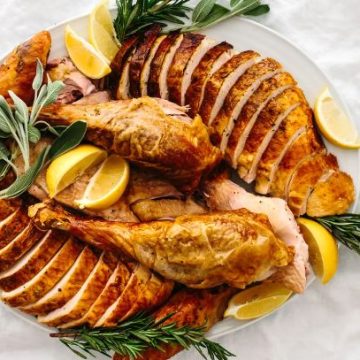
Plating a Carved Turkey
The first step is to choose a platter that is big enough to hold all of the meat without overcrowding. I also like to consider any extra garnishes, such as fresh herbs, sliced lemons, or seasonal fruits like cranberries or apples, that I want to use to decorate the platter. When it comes to arranging the meat, there are no hard and fast rules. It all depends on the size of your platter and your personal preferences.
I usually start by placing the most impressive pieces, such as the juicy breasts and succulent drumsticks, in the center of the platter to make them the focal point. From there, I fill in any gaps with the other pieces of meat, making sure to leave enough space so that everything is easily accessible for serving.
Serve it Right Away
When the turkey's meat is taken out, it will quickly cool. Therefore, be sure that all of your Thanksgiving side dishes, salads, sauces, and other treats are prepared, set out, and ready for consumption. Then, as the table's focal point, swoop in with your exquisitely carved turkey and astound your guests.
HOW TO CARVE A TURKEY LIKE A PRO
Ingredients
- 1 roasted turkey
- any garnishes like lemon slices, cranberries, fresh herbs, etc.
Instructions
- Remove the legs and thighs by slicing through the skin between the leg and the breast. Then pull back on the leg, laying it flat outward, and push up on the joint from underneath. You may hear a slight pop. At that point, use your knife to cut around the joint and remove the leg and thigh completely. Repeat this process on the other side and set these pieces aside.
- Remove the breasts by slicing down on either side of the breast bone, using long strokes. As your knife hits the bottom, use your thumb to gently pull the breasts outward, continuing to slice down and out until the breast meat is removed. If needed, you can slice horizontally at the bottom of the breast from the outside to help remove it. Repeat this process on the other side and set the breasts aside.
- Remove the wings by gently pulling them away from the body and slice through the joint to remove it. You can remove the wing tips (there's really no meat here), then set aside.

- Separate the drumstick from the thigh by flipping this piece over so it's skin side down. Slice through the meat and gently pull pack on the drumstick to expose the joint, then slice through it. You'll have two pieces, the drumstick and the thigh.
- Remove the bone from the thigh by using your knife to slice around the thigh bone, preserving as much meat as possible.
- Carve the final pieces. Just slice against the grain for tender pieces of meat, and try to keep the skin attached to each piece.
- Arrange all of the pieces on a platter and add any garnishes.

LISA'S TIPS
- The platter I'm using is perfect if your turkey is 13 pounds or less. For a bigger turkey, use a larger platter.
- Wondering if pink turkey meat is safe to eat? Read this information from the USDA.


Leave a Reply